

If you press any button other than Preview and “Sanity Check” button is on, you will see the Render Check dialog.
You can resize this dialog. The size will be kept for the session.
If you want to sanity check when you don’t render, right click the Sanity Check button. If passes are selected, the selected will be checked. if no pass is selected, all passes will be checked.
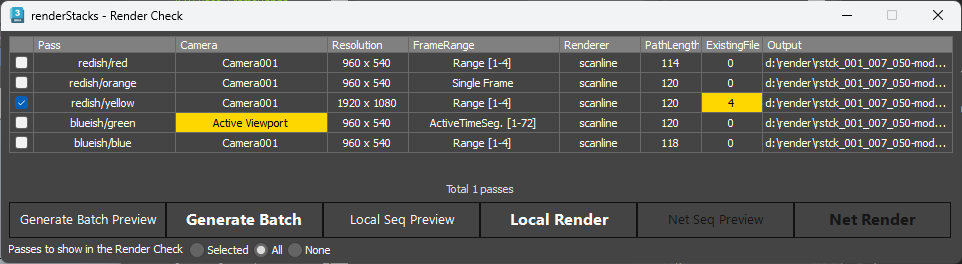
It checks all selected passes and show the result of sanity check. If it finds any potential issue, it will show as yellow text on red background.In the above image, you can see CameraC doesn’t have camera assigned and CameraB pass already has renders in the output folder.
If you want to remove any pass from render. uncheck the checkbox at the far left. By default, all check boxes will be checked. Therefore, if you want to submit as is, just press a render or submit button you want.
Camera
If no camera has been assigned in Camera pmod or Camera pmod is missing, you will get a warning.
Path Length
If path length exceeds more than 255 character, you will get a warning.
Existing Files
If rendered files already exists, you will get a warning.
Output
If yo have not set render output, you will get a warning.
New in 1.1, if multiple pass have same ooutput path, you will get a warning.
Passes to show in the Render Check – determine what you can see in the list when you open the Render Check dialog. There are 3 options.
- Selected – the default. Show only the passes that are currently selected.
- All – Show all passes, but check only selected passes.
- None – Doesn’t display any passes, but still submits the selected passes. Useful for quickly submitting scenes with hundreds of passes.
You can set the default in the Preference dialog.