[wpdm_package id=’820′]
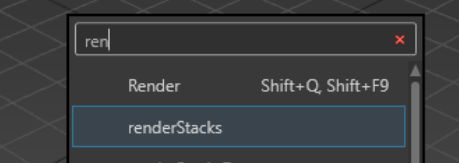
Let’s open renderStacks. It is under RenderStacks category if you want to make a button. I would just press “X” and search for it.
OK, this is the renderStacks.

renderStacks has 3 big panels as a main UI and a menu at the top and render buttons at the bottom. From the left to the right, it is Pass tree panel, Pass modify panel and Note panel.
Pass tree panel is where you make a pass and add pmodifiers to defined that the pass would do. Pass modify panel is like 3ds Max modify panel. You can see and edit the parameters for each pmodifiers. The last panel is for Note and Settings.
Making First Pass
Let’s make our first pass. Please load renderStacks_Tut_001.max file. If you look at the Pass tree panel, there is an item called “::base” by default. Even though it is in Pass tree panel. That’s not a pass. It is called base depot. We will talk about that later. Above the Pass tree pane, there are buttons for pass and pmodifier management.
- Press Add Pass button.

-
The Name the pass dialog will pop up. type “cam A”.
As you type, you will see the Make new pass button is activated.
-
Press Make new pass button.
By default. pass name only allows alphanumeric character, underscore and dash. Usually you would use pass name as a part of output path. So, it is not a good idea to use space or special characters in the pass name. -
Make 2 more passes, “CamB” and “CamC”. You can type both pass name with comma as a separator to make them at once.

- Click around each passes.
Nothing is changing because you have not told renderStacks to do anything. renderStacks control only what you want to control. That’s one of advantage of renderStacks.
Adding first pmodifier
Now let’s make renderStacks do something. How about different camera for each pass?
- Select cam B pass and press Tab. You can see all the pmodifiers you can add.

-
Press c and a. Now you only have Camera pmodifier. Above the list. it will show the current search word.

-
Press Enter or double click Camera. You have very first pmodifier in the renderStacks. The Pass modify panel shows the selected pmodifier’s parameters.

-
Right click treeview and choose Expand All.

-
 Even though, you only added Camera pmodifier to Cam B. You can see all other passes and base depot has green Camera pmodifier called “Base_Camera”. Those green pmodifiers are base pmodifiers and automatically shows up on all passes when you add first pmodifier of any kind. These green base pmodifiers are NOT actually added to the passes. It is just a visual indication that this pass will use base pmodifier because there is no local pmodifiers. Base pmodifiers are stored in ::base depot
A base pmodifier stores base state of the pmodifier type. if a pass doesn’t have own local pmodifier, the base pmodifier will be used. Also it used as a start point for the accumulative pmodifier.
-
Make sure you still select the Camera_001 pmodifier. Go to Pass modify panel and click RenderCam dropdown and select Camera001. You can see the active viewport is changed to Camera001 view.

-
Now open “CamA” pass and select the green Base_Camera pmodifier. Choose PhysCamera001. What you have done is telling renderStacks that you will use Camera001 for Cam B pass and PhysCamera001 for all other passes.

- Click “CamC”, you can see it already has “PhysCamera001” because “CamC” pass doesn’t have local pmodifier and share the base pmodifier.
This is the core fundamental workflow of renderStacks. You decide what to control and have a base state for the default state. Then, you locally override individual passes as you need.
Adding Second Pmodifier
Now let’s add another type of pmodifiers, Resolution.
- Select Cam A pass and hold control key and select Cam C pass. Yes, you can multi select passes for most task.

-
Press Tab and type “res”
-
. Then, press Enter. You can see two pmodifiers added to “CamA” and “CamC” pass, and Base_resolution is added to Cam B.
You might notice that local Resolution pmodifier for “CamA” and “CamC” pass are under Camera pmodifier. But, base Resolution pmodifier on “CamB” pass is above Camera pmodifier. That’s because base pmodifiers are always executed before any local pmodifiers. The order of pmodifier you see in the Pass tree panel is the exact order that renderStacks is.

-
Set Resolution pmodifier in “CamA” pass as 1920 by 1080 using preset dropdown.

-
Same for “CamC” pass. But, Let’s check Scale option and set to 50%. As you change Scale and Overscan value, the Output Resolution will show the final output resolution in real time.

-
For Cam B, lets unlock the lock image ratio button and set resolution as 2048 by 2048.

- Click each pass or pmodifier’s of the pass to activate the pass. You can see the camera and safe frame image ratio is changing as we set.
Preview Passes
Good. You are successfully set your first render passes with renderStacks. Now it is time for preview renders. You need to make sure if your pass setup is correct. For preview, renderStacks utilize out rsPrvRender.
- Select all 3 passes.
You can select passes one by one with CTRL and SHIFT key.
Or, there is an easier way if you want to select all passes. - Open the pass set dropdown at the button of treeview. You can see built-in “All” pass set which select all passes! For the details for pass set, please check here.

- Select “All”. You can see all passes are selected.
- Click “Preview” button at the bottom.
- renderStacks will render previews for all 3 passes and assemble them in RAMPlayer.
If you want adjust preview setting, rightclick Preview button. The rsPrvRender dialog will open. The options you set there will be used for renderStacks, too.
Controlling Pass Globally
Now we want to batch render all 3 passes we just made. Since this scene doesn’t have animation, we want to set frame range to Single frame for all three. To control all passes globally at once, we can just add a Frame Range pmodifier directly at the base depot. Do you remember I mentioned base depot in the beginning of this tutorial? Base depot is not a pass. It is a storage for base pmodifiers. If you add pmodifiers there, that means the pmodifier will be used for all passes until any pass has own local pmodifier.
- Select base at the top.
- Press Tab and choose Frame Range.
- Select any one of Base_FrameRange pmodifier and set to Single.

You may already have noticed it. But, one of renderStacks goal is bringing all rendering related controls in one place. if you use renderStacks, you don’t need to open render setup dialog at all. All options you control in Render Setup dialog can be controlled in one of the pmodifiers. Also opening Render Setup dialog slows down activating pass. So, close Render Setup dialog all the time.
Setting Output Path
Lastly, you need to setup output path for your beautiful rendering. You can name each output path per pass explicitly. But, you can also use various tokens to generate output path dynamically.
- Select ::base again.
- Press Tab. Add RenderOutput.
The default output path will be applied using tokens.
<prjrenderoutput>/<SceneName>/<PassFullName>/<SceneName>_<PassFullName>..exr
I think you can easily guess what the output would be.
<prjrenderoutput> is out render output folder from project folder which is C:\Users\[username]\Documents\3ds Max 2021\renderoutput by default.
<SceneName> is your scene file name without extension, renderStacks_Tut_001
<PassFullName> – pass full name, CamA - The final output path is…
C:\Users\[username]\Documents\3ds Max 2021\renderoutput\renderStacks_Tut_001\CamA\renderStacks_Tut_001_CamA..exr
Now you can either batch local render or send to a render farm for all selected passes. Just select passes and press Local Render or Net Render.
That’s it. This is the end of the first renderStacks tutorial.
Thanks