
In the first tutorial, we checked Camera, Resolution and Frame Range pmodifiers. Another most used pmodifier is Visibility pmodifier which controls which objects to show and hide for the rendering.
Use this pmodifier to define what to render. NEVER USE “REDERABLE” property to control what to render. If you don’t want/need render. You should not see in viewport either.
To use Visibility pmodifier, we need to know how to defined object selection in the renderStacks which is a unified dynamic object selection method for all pmodifiers.
Let’s open the renderStacks_Tut_001.max file again. If you have saved renderSTacks data file when you follow the previous tutorial. Go File menu and click Reset.

Making a Visibility Pmodifier
- Make a pass “Teapots”.
Add a Visibility pmodifier
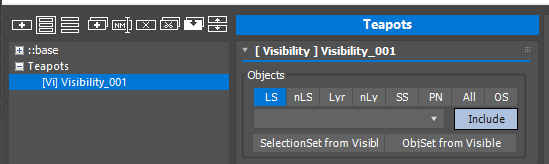
Visibility pmodifier allow you to hide/unhide objects per pass. Whatever object you defined in the above unified object selection UI will be shown in viewport, and all other objects are hidden.
renderStacks support 8 ways to define a set of objects. Form the left to the right, LS(LayerSet),nLS(Nested LayerSet), Lyr(Layer), nLy(Nested Layer), SS(Selection Set), PN(Pathname), All, OS(Object Set)Among all 8 methods, I recommenced to use Layer Sets. It is like a selection for layers. With Layer Set, you don’t have to micro manage every single objects. Also even when objects internal id changes like making a new object for same name or re-merging the same name object, you don’t have to re-define the selection as long as you put objects in the same layer.
Making a Layer Set
For “Teapots” pass. We want to render all teapots and the cylinder base. Let’s make a layer set for that.
- Open Layer Explorer.
- Expand All.
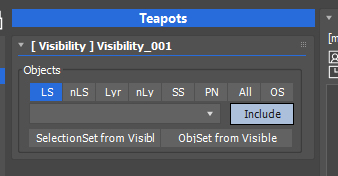
In the Visibility pmodifier, click LS button.
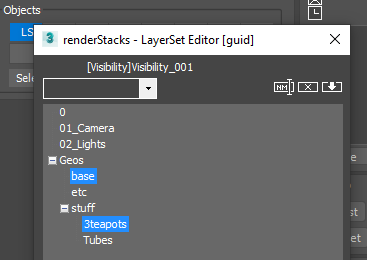
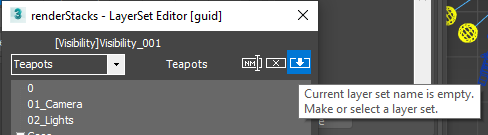
- Then, right click LS button to open Layer Set editor. You will see the layer trees.
- Select “base” and press CTRL and select “teapots”.
-
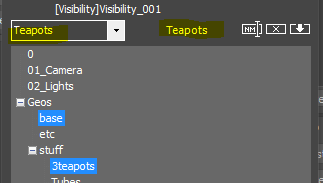
In the dropdown, type “Teapots” which will be a new layer set name, and press Enter. The newly made layer set name, “Teapots” will show up between dropdown and buttons. That area is a display area for the currently selected layer set name.
-
Because we open this Layer Set editor from a pmodifier, you can directly assign the “Teapots” layer set to the Visibility pmodifier using “Apply” button.
-
Press the Apply button. You can see “Teapots” layer set in the dropdown. Also in the viewport only teapots and cylinder platform is shown now.
-
Check the Layer Explorer. You can see only “base” and “teapots layer” are turned on. But, you can also see that “Geos ” and “stuff” layers are turned on. Why? We didn’t include those in “Teapots” layer set. It is because a parent layer is always override child layer in 3dsMax nested layer system. We can not just turn on “base” layer without turning on “Geos” layer.
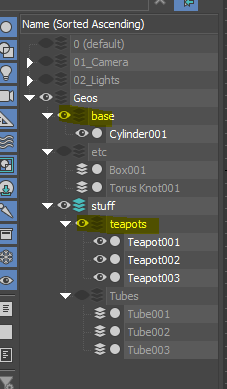
For Visibility pmodifier, renderStacks will always automatically take care this nested layer on/off.
Making a Nested Layer Set
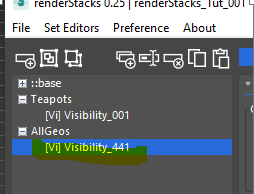
- Make a new pass, “AllGeos”
- Select the “Base_Visibility” pmodifier in “AllGeos” pass.
- Press Duplicate Nodes button. This is a quick way to localize base pmodifier.

-
You can see the the Visibility pmodifier is turn to white(local pmodifier) and the number at the end has been changed.
- Click nLS(nested Layer Set) button.
- Right click to open Layer Set Editor.
- We want to show all geometries and lights. But, We don’t want to show camera.
Select “02_Lights” and “Geos”. - Type “allGeo_and_Lits” in the dropdown.
- Press Enter.
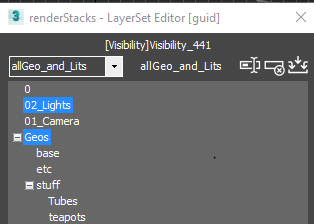
- Press Apply button.
If you set layer set as a nested layer set, all the children layers of layers in the layer will be used. Therefore, when you select “Geos” layer, all children layers of “Geos” layer will be turned on. Now you can see that all geometries and lights are unbidden. But, all camera are hidden.
Using Single Layer and Its Nested Layer
OK, it is cool to be able to make a layer set. But, what if I have everything I need in a layer? Do I have to make a new layer set for just one layer? Is that even a set? For the lazy users like you, renderStacks has Lyr(layer) and nLyr(nested layer) as object selection, too.
- Make “Tubes” Pass and add a Visibility pmodifier or dup the “Teapots pass”.
- Select “Lyr”.
- Open the dropdown under “Lyr”. You will see all layers in the scene.
- Choose “Tubes”

-
Only pineapples in the “Tubes” are shown in the viewport.
- Make “Stuff” Pass with a Visibility pmodifier. You better know how to do this at this point. 🙂
- Open the new Visibility pmodifier.
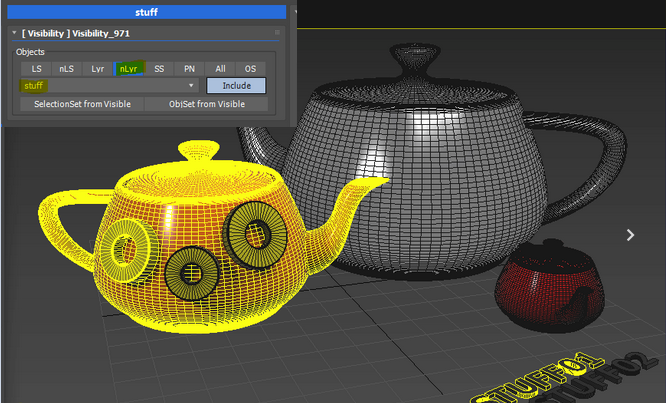
- Select “nLyr”.
- Open the dropdown under “nLyr”. You will see all layers in the scene.
- Choose “stuff”. Everything under “stuff” layer will be shown.
Selection Set
You can also use 3dsMax’s built-in selection set and use built-in tools to make and edit selection set.
- Make “ssSample” Pass and add a Visibility pmodifier or dup the base Visibility pmodifier.
- Select “SS”.
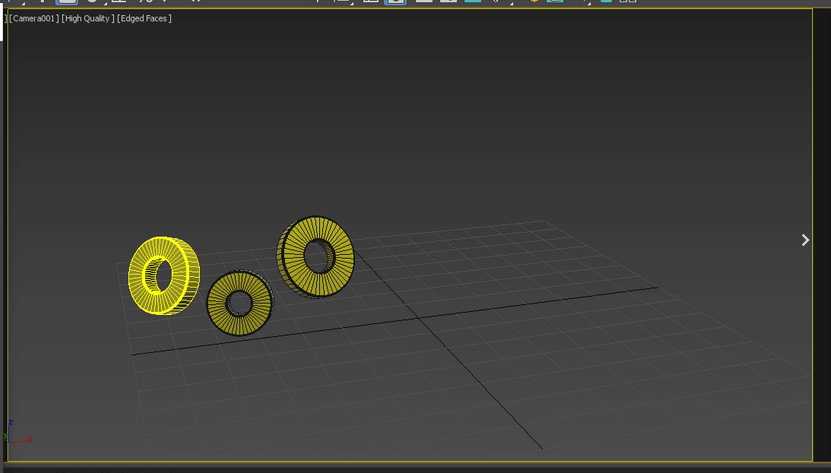
- I already made “sstest” selection set in the file. Choose “sstest” from the dropdown.
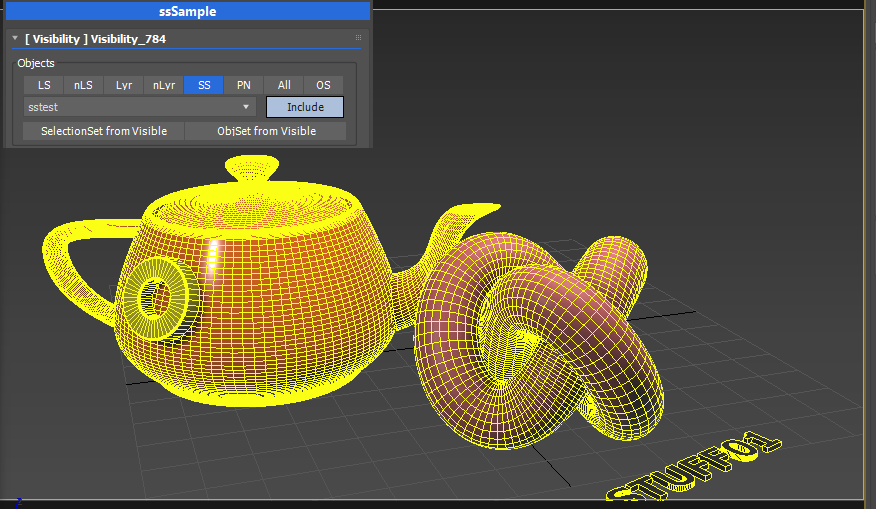
- You can see 4 objects with yellow wireframe are shown.
Pathname
In Maxscript, pathname is a way to name objects with hierarchy or pattern matching. Basically it allow You to select object with wild card character.
For details about pathname, please check 3dsMax help Help.
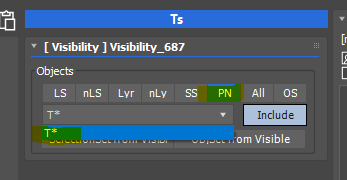
- Make “Ts” Pass and add a Visibility pmodifier or dup the base Visibility pmodifier.
- Select “PN”.
- Right click “PN” button to open Set Editor.
“Pathname” should be already selected. - Type “T*” in the button textbox.

-
Then, press Add Set button.
The new pathname will be shown in the list.

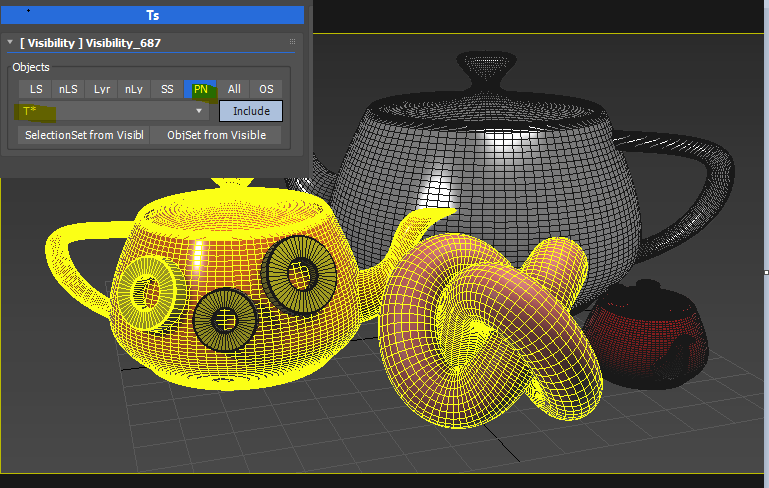
- Close Set Editor.
- Choose just added pathname from the dropdown under “PN” button.
- Now all the object whose name started with “T” will be shown in the viewport.
ObjSet
This is a uber object selection method. It allows you to mix and match all above 7 ways to select objects. With this feature, you don’t have to make a new LayerSet that combines multiple LayerSet or exclude one or two objects from LayerSet without moving objects out from the current layers. This certainly allow you very powerful way to selecting objects. But, I highly recommend not to go too crazy with this.
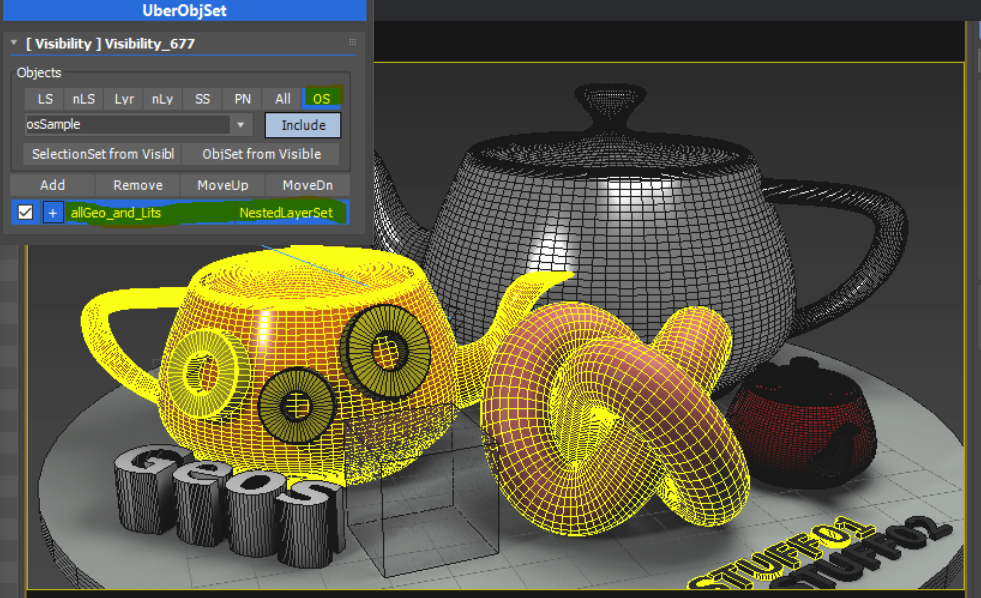
- Make pass “UberObjSet” and add a Visibility pmodifier or dup the base Visibility pmodifier.
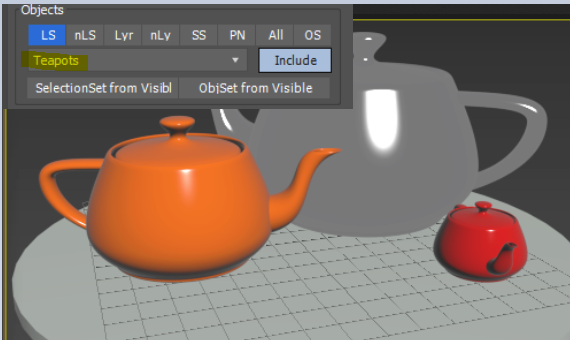
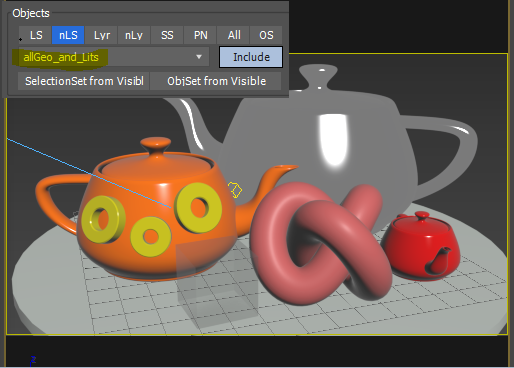
- Click “OS”. You will see 4 new buttons at the bottom, and the dropdown change to editable textbox.
- Type “osSample” and press Enter.
A new line will pop up at the button.
Each line has 4 columns.
The first checkbox allow you to temporarily enable/disable the entry
+/- button means add/subtract3rd and 4th is set name and set type. You need to select set type first then 3rd column content will updated. - Let’s start with nested layer set “allGeo_and_Lits”. Change 4th column to “NestedLayerSet”. Then, choose “allGeo_and_Lits” from 3rd column.
- Press “Add” to add another line.
- Let’s remove objects in “ssTest” selection set. All yellow wireframe color objects are them. Select “SelectionSet” from 4th column.
- Choose “ssTest” from 4rd column.
- Then, press [+] button on 2nd column. The button will change to [-], and all the objects with yellow wireframes are gone.
This is a basic workflow of ObjSet. You stack each object selection method to add or remove objects from selection. As always the evaluation order is from top to bottom.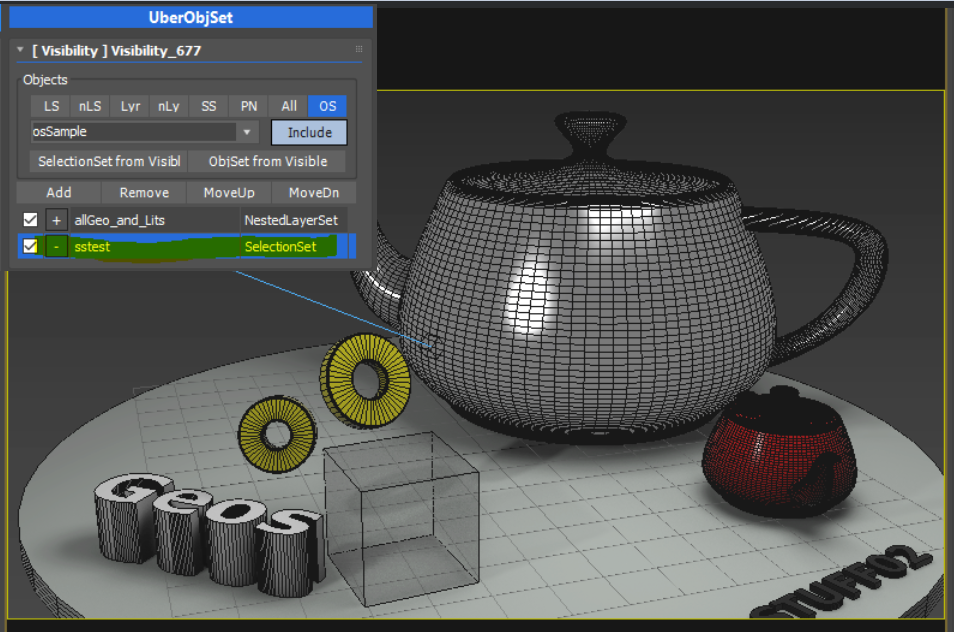
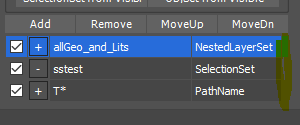
- Let’s bring back out T’s. Press “Add”.
- Set as “Pathname” and “T*”

-
Got it? Add more entries and try various combinations as you want!
- Try to turn on/off the checkboxes.
- You can select multiple rows and “Remove” at once. But, you can only move up and down one at a time.
- Because most row spaces are dropdown. Sometimes it is hard to just select a row to delete or move. For that, there is a little empty space at the right end. If you just want to select rows, click that area.
OK, I think this is it for object selection method. Yes, I know I didn’t explain “All”. But, do you really need an explanation for that?
Thanks!