Pmodifiers on passgroup is a new feature of renderStacsks 2.0. This will allow you to a hierarchical override setup. With newly added pass instancing feature, you will be able to build and manage hundreds of passes easily. In this tutorial, we will learn how to utilize the new features.
Let’s load our tutorial file. This scene is using Arnold. Please make sure to update Arnold to the latest version.
* File download is unavailable currently.
And, you also need to download this rs xml file.
* File download is unavailable currently.
Ok, if you are ready, let’s do this.
- Open the max file and unzip rs xml file somewhere.
- Open renderStacks. Select File menu > Load…
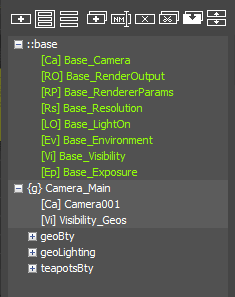 Pick renderStacks_tutorial6.xml file from the zip.
renderStacks should look like the right image.
Yes, you can save/load renderStacks settings as an xml file. If you have used material or maps, it will also have an companion .mat file.You can use the feature t..
- transfer renderStacks setting between max instance
- share with other users.
- You can also save as startup file(Preference > Save startup file) so you can always start with your favorite settings.
- hand off to artist as an template for sequence or shots.
Back to what we just loaded, you can see it has a passgroup, {g} Camera_Main which has 3 passes(getBty, geoLighting, teapotBty) and 2 pmodifiers(Camera_001 and Visibility_Geos).
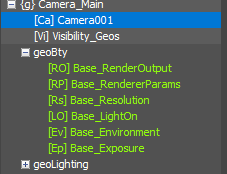 Expand geoBty pass. Let’s see what’s happening here.
When there is pmodifiers on passgroup, that pmodifier will be applied to all passes for the passgroup. Imagine having those 2 pmodifier at the top of getBty pass. That’s why geoBty is not using base Camera and Visibility pmodifier.- Preview geoBty. It should look like this.
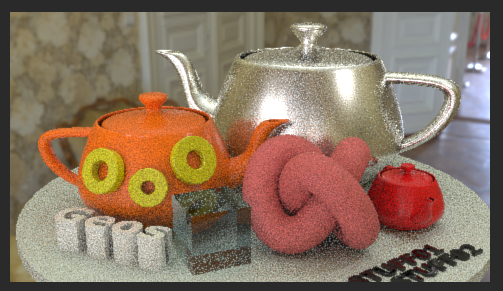
Wait a min? Why it is using Arnold Render View? It was not doing this for tutorial 1-5, and if you are using 3dsMax 2021+. Where the hdri comes from?All that comes from the rs xml file you loaded. I told you, you can use rs load/save to hand off scene settings.If you are using lower version of 3dsMax you will need to add own hdri.if you are using lower than 3dsMax 2019. You will also need to setup own environment map because it is using HDRI Environment OSL map. - If so, select Base_Environment pmodifier, press the value button of “Environment Map” parameter(It should say “hdrt”).
- Open Classic Material editor.
- Choose Put Into Classic ME active slot.
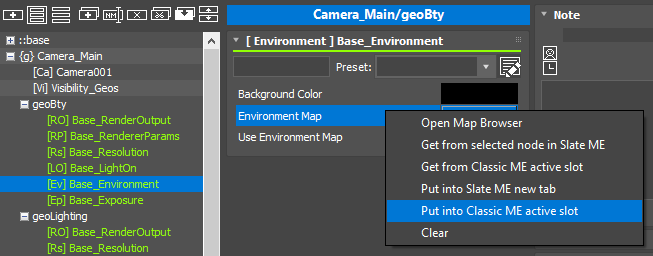
- Set own map or assign own hdri image file.
- Preview geoLightingpass. It has shader ovderride with white material.
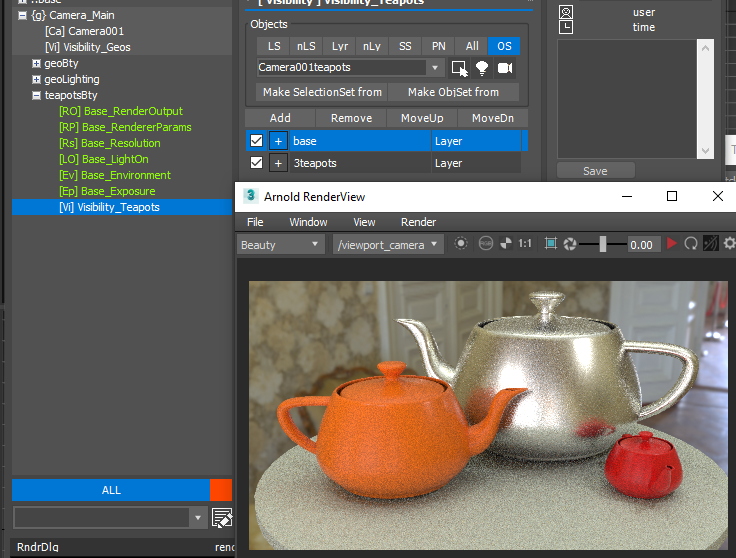
- Preview teapotBty pass.
OK. This one is interesting. It has own Visibility pmodifier which has base and teapots(Visibility_Teapots). But, {g} Camera_Main also has Viability pmodifier??? Again renderStacks execution order is from top to bottom. Always whatever at the most bottom is the one that would be used.But, but, if that’s the case, the pmodifier in passgroup(Viability_Geos) shouldn’t be colored as black? It does if a pass has multiple pmodifiers of same type. Well… Viability_Geos is used by geoBty and getLighting tho. For them, it should be white. Therefore, pmodifiers on passgroup would not change color like pmodifiers in passes.

Now I hope you understand how pmodifier on passgroup works. You can have common pmodifier for all passes while you would override some passes if you need.
Another big companion feature of pmodifier on passgroup is instancing passes. This is actually really cool.
- Select {g} Camera_Main passgroup.
- Press SHIFT+W. It will collapse only passes(Collapse Single Level). This shortcut has bbeen changed from SHIFT+C to SHIFT+W because we needed a lot more copy/paste shortcuts.
- Press SHIFT and press Duplicated Node button.
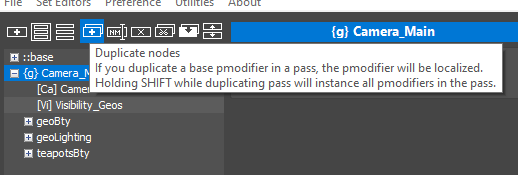
- OK. do you see this? What just happened?
It duplicated the passgroup tree. But, look at the pass names. Their name is in bold which means it is instanced.
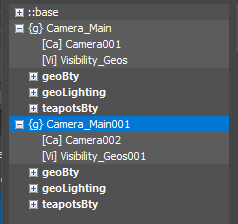
- Select Camera002 pmodifier.
- Change to PhyCamera001.
- Select Camera_Main001/geoBty pass and preview. It should look same as Camera_Main/geoBty except camera.

- Expand Camera_Main/geoBty pass.
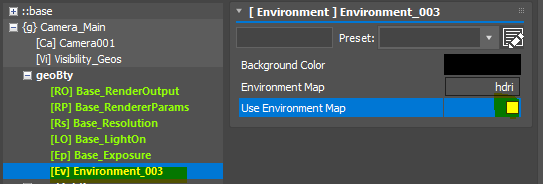
- Select Base_Environment and press Duplicate Nodes button. If you duplicate base pmodifier in a pass, you are making them as local pmodifier. Now you will get Environment_003 local pmodifier.
- Turn off Use Environment Map.
- Preview
- Camera_Main/geoBty pass.
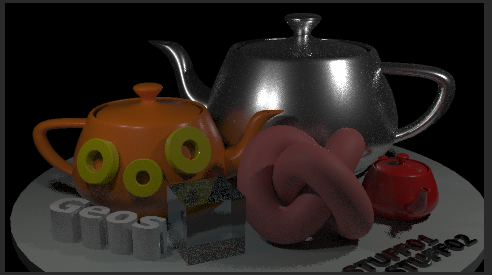
- Now expand Camera_Main001/geoBty pass.
You can see that It has same Environment_003 pmodifier. - Select Environment_003 pmodifier. Use Environment Map is also off because they are instanced pmodifier. If you preview Camera_Main001/geoBty pass, it should look like this.
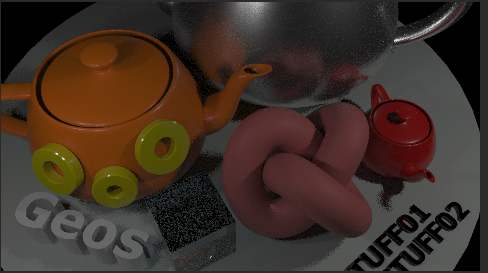
- Select Camera_Main001/geoBty pass and press 3 key. You can see Camera_Main/geoBty pass color also changes.
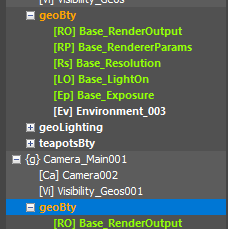
- Select Environment_003 from one of geoBty pass and delete it. It will be removed from both geoBty passes.
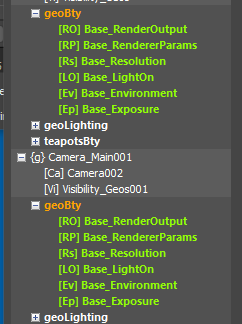
As you can see instanced passes are just like instanced pmodifiers. They are same passes in different passgroup. With this, you can manage same pass setup across passgroups easily. It essentially give you one more dimention to pass management.
You can also override more things per passgroup by adding pmodifiers on passgroup.
- Select Camera_Main001 passgroup
- Add a Resolution pmodifier and set resolution to 960×960.

- Preview Camera_Main001/GeoBty pass.

This is the basics of pmodifier on passgroup and instanced.
Thanks!
